< Go back to Help
See instructions and screenshots below for help with messaging on ConnectNetwork.
| Instructions | Click to Enlarge |
|---|---|
| 1. First, Sign In to your ConnectNetwork account. Enter your Email Address and Password. Then click “Sign In.” |  |
| 2. To send an e-message, click “Messaging” under “My Services,” which is located in the “Dashboard” on the left side of the page. | 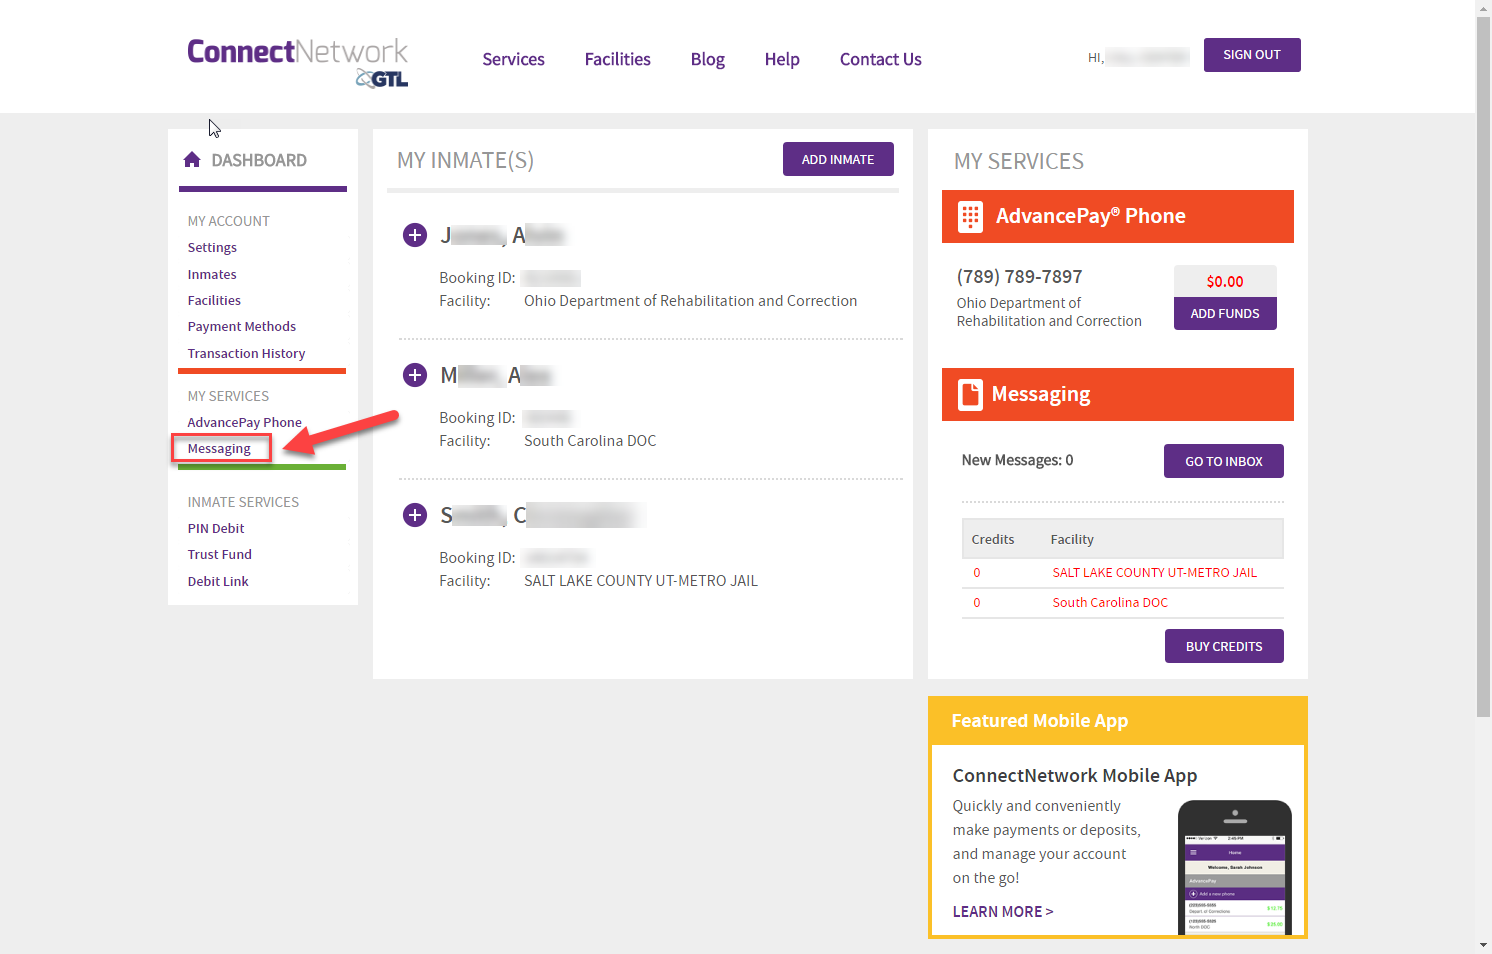 |
| 3. If this is the first time you are sending a message through the ConnectNetwork system, you can select the “GET STARTED” box on your screen to help walk you through the process of composing a message and also purchasing any necessary credits to send your message. | 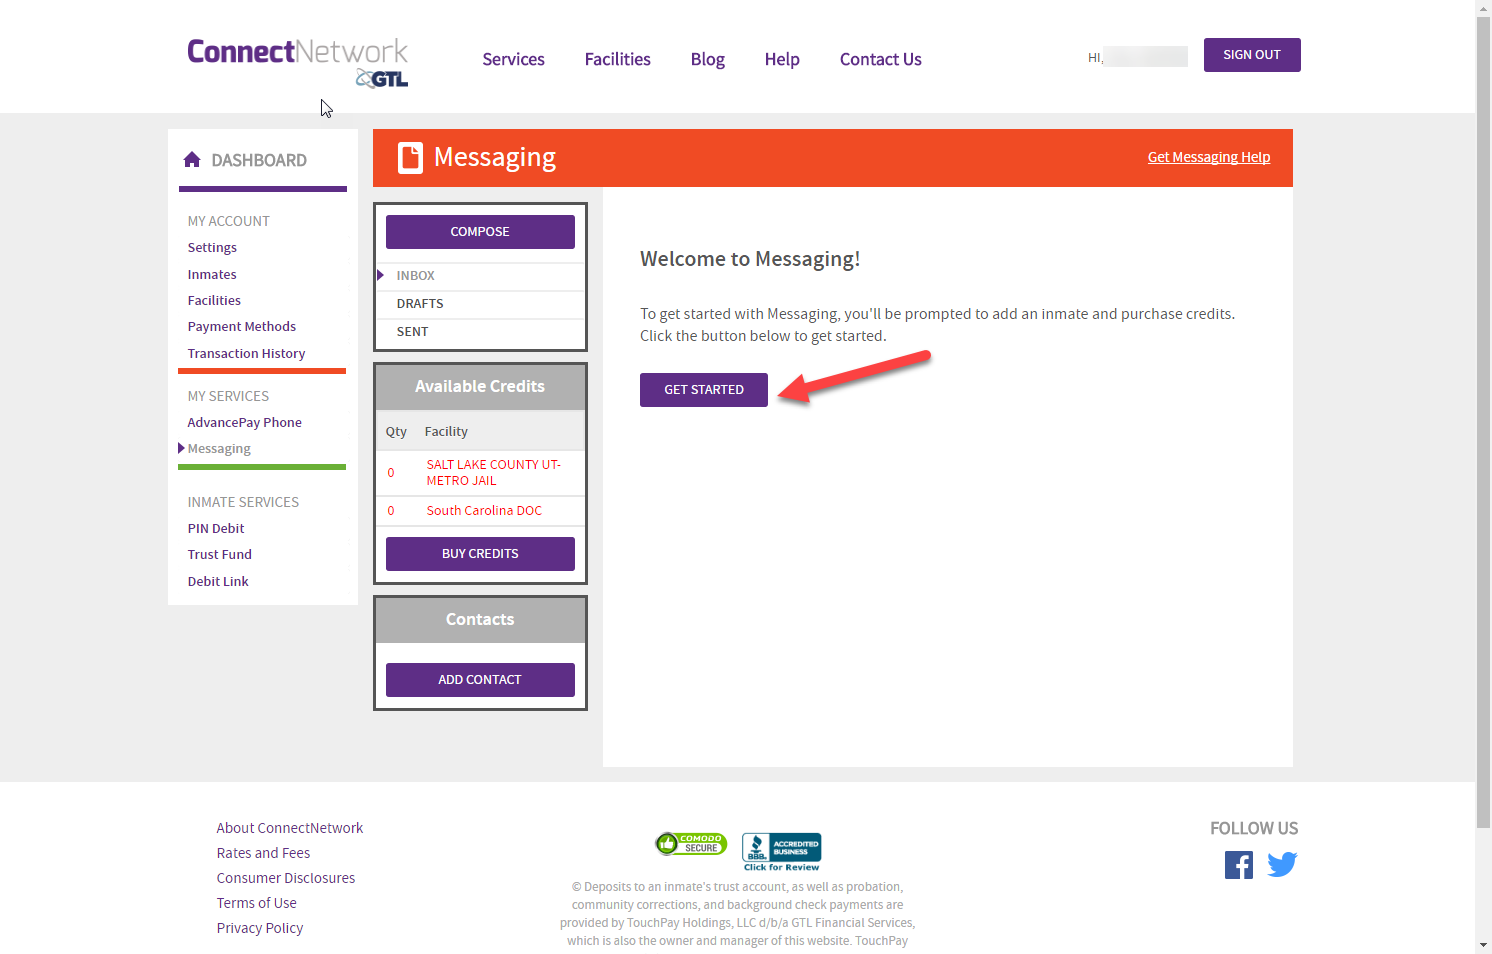 |
| 4. Prior to composing your message, you will need to select the applicable correctional facility located in the selection box titled “Facility.” Note: If your inmate’s facility is not listed, please return to your online profile and add the necessary facility to your available locations. | 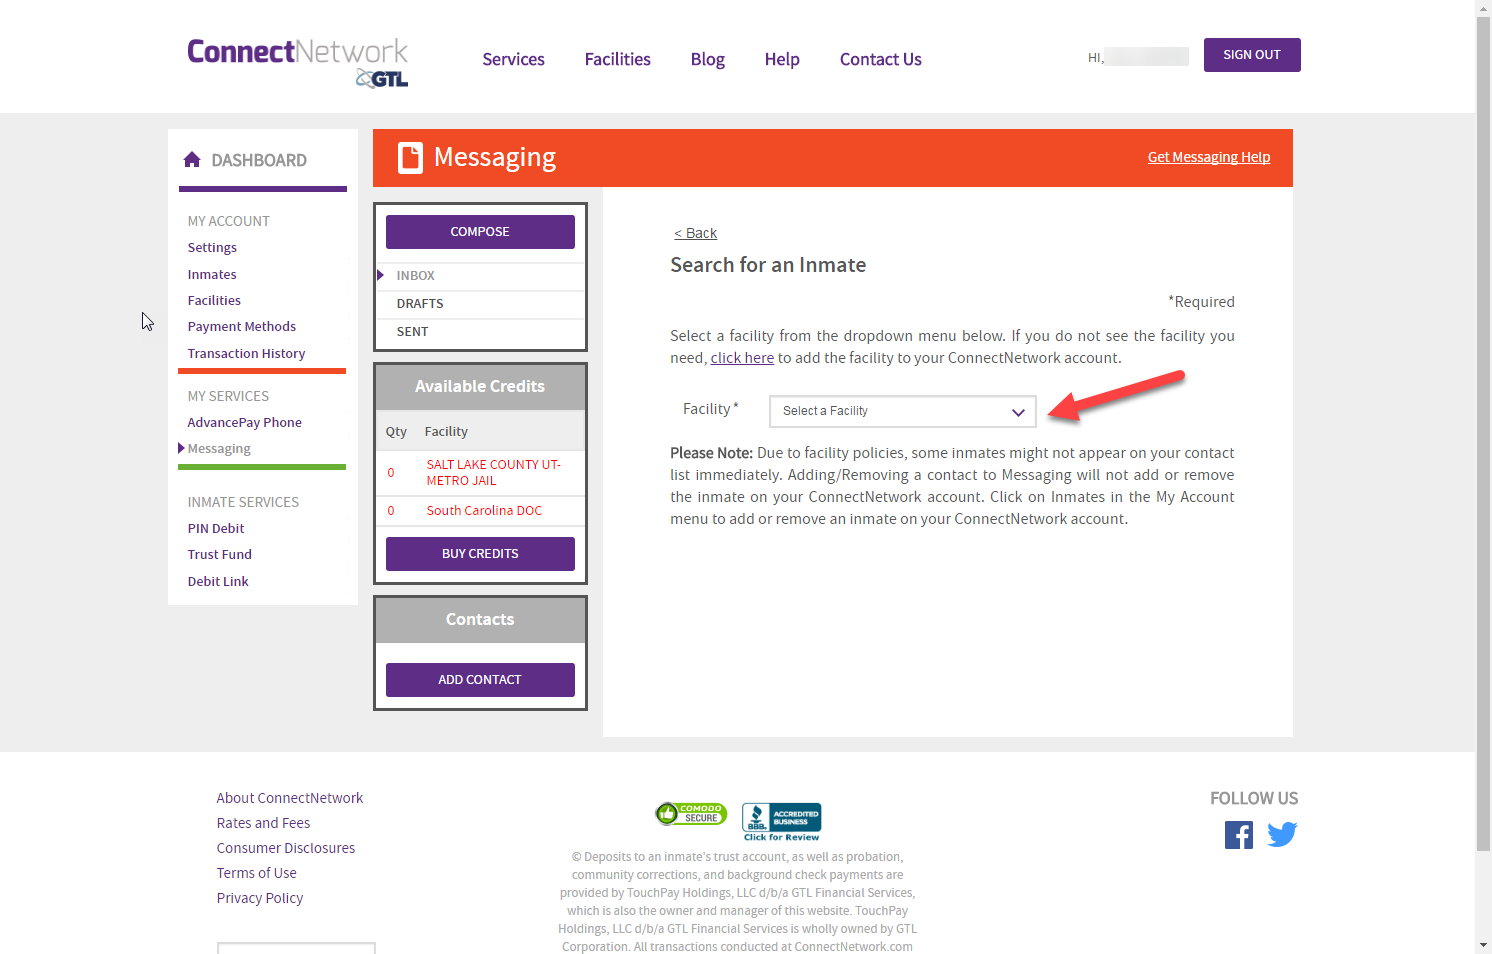 |
| 5. You can use the inmate number and/or the inmate’s first or last name to find your loved one or friend. Type in the requested information (you can use any of the available fields) and it will create a list of matching inmates for you to select from. | 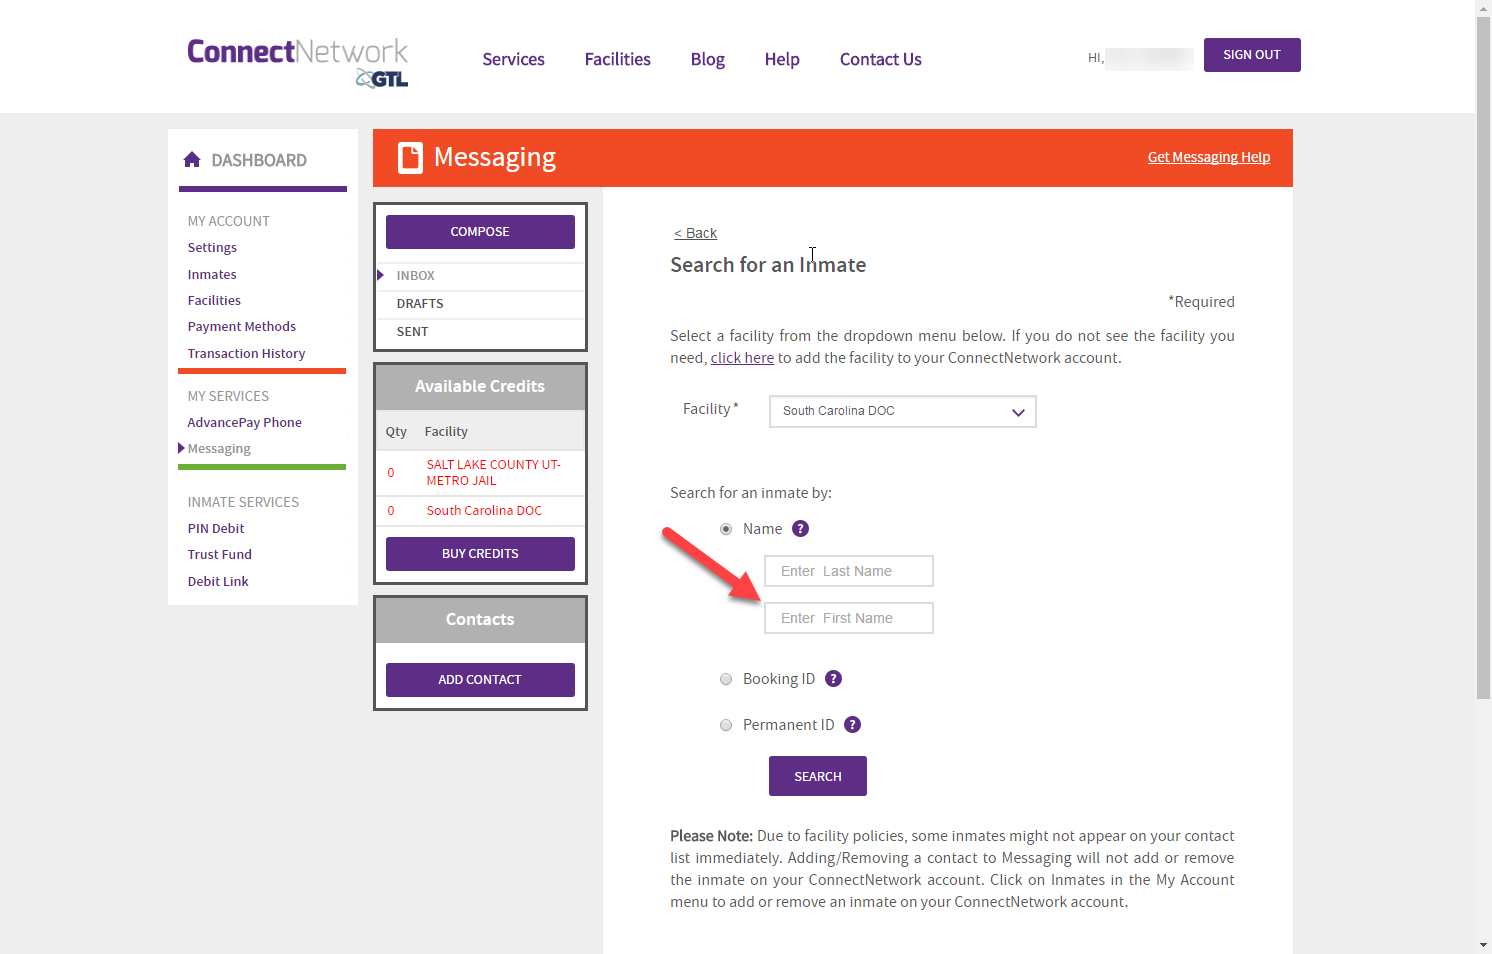 |
| 6. Once you see the correct inmate, click the “SELECT” button to the right of their name to add them to your contact list. | 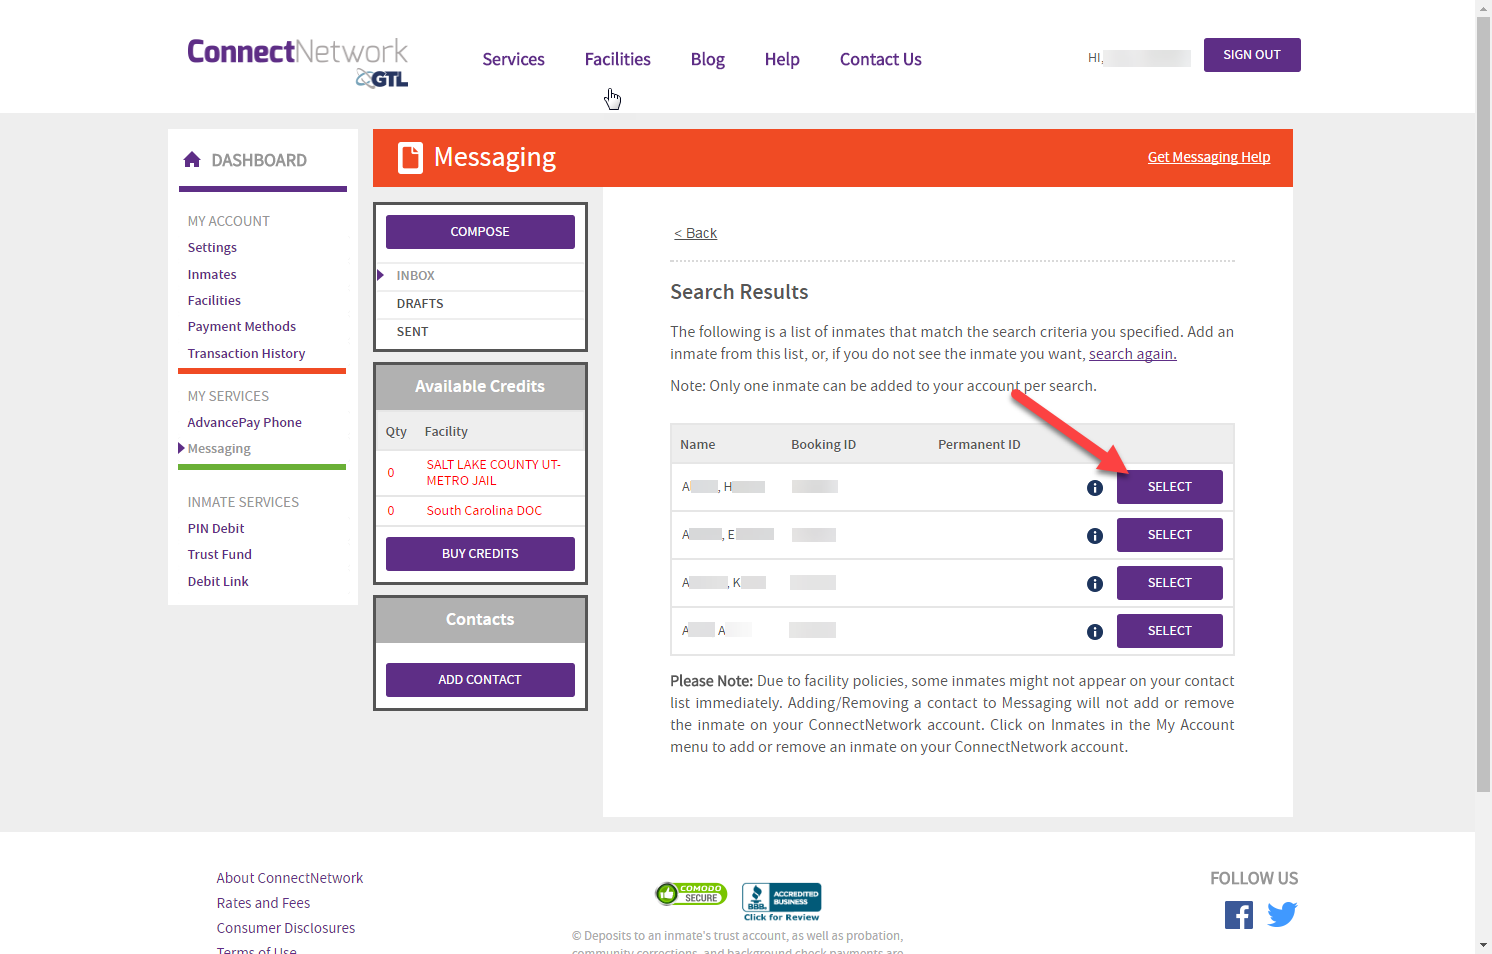 |
| 7. Once you have added your contact, you will be given the option to “GO TO INBOX” or proceed to “BUY CREDITS” for your account. To add credits, click the “BUY CREDITS” button. | 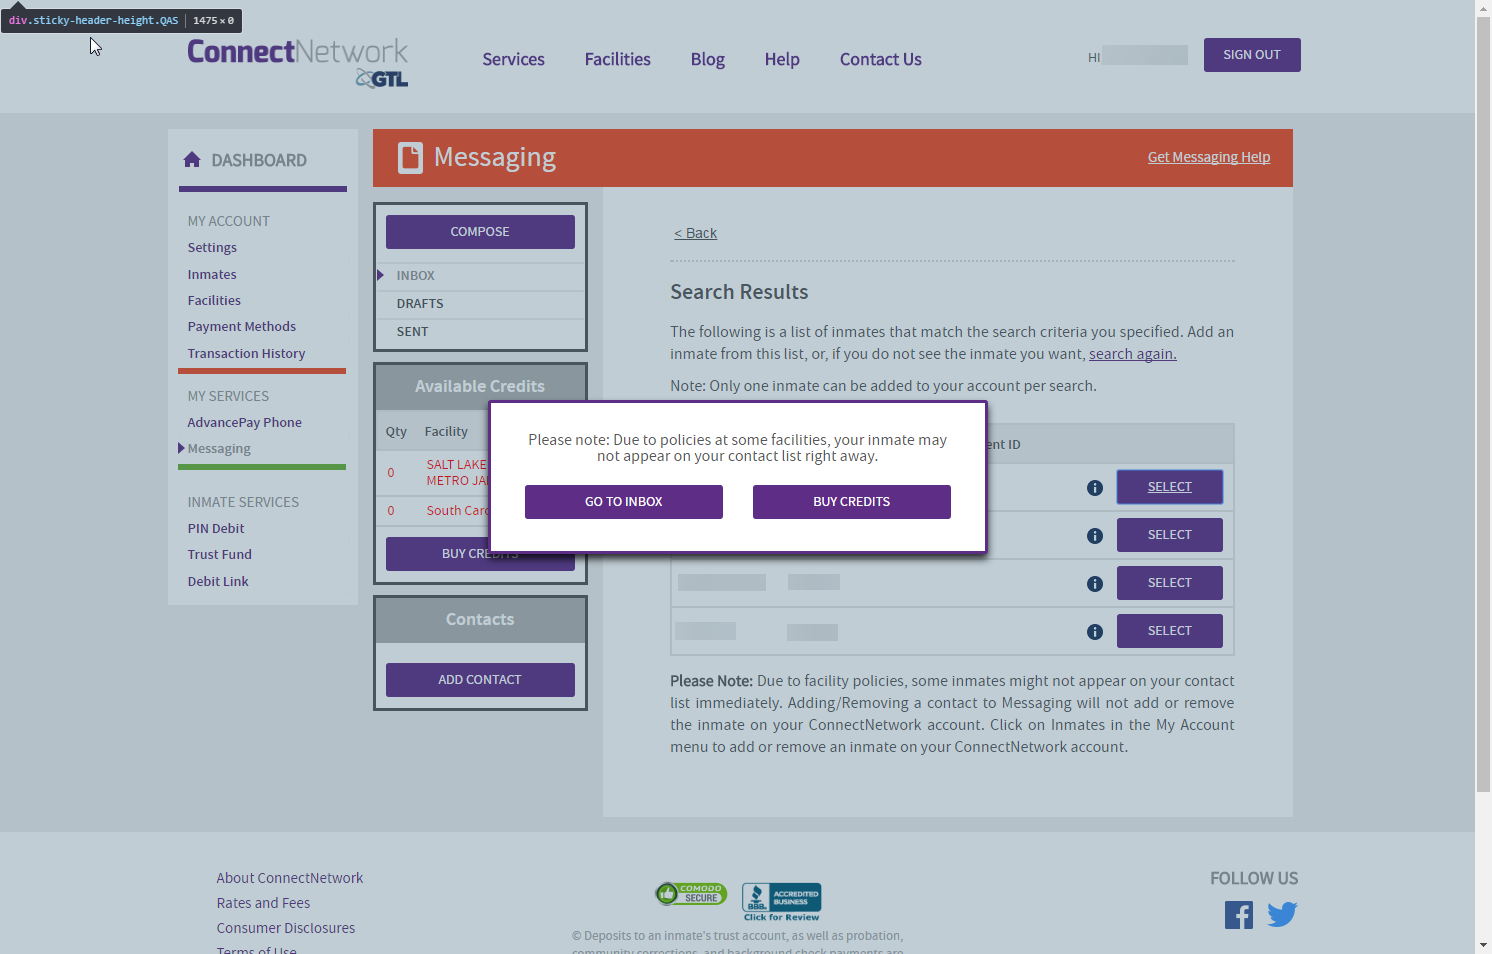 |
| 8. In order to buy credits, start by choosing the “Facility” where the inmate is located. Next, you will need to select the amount of “Message Credits” you would like to purchase for this transaction. Once you are done, click “NEXT.” | 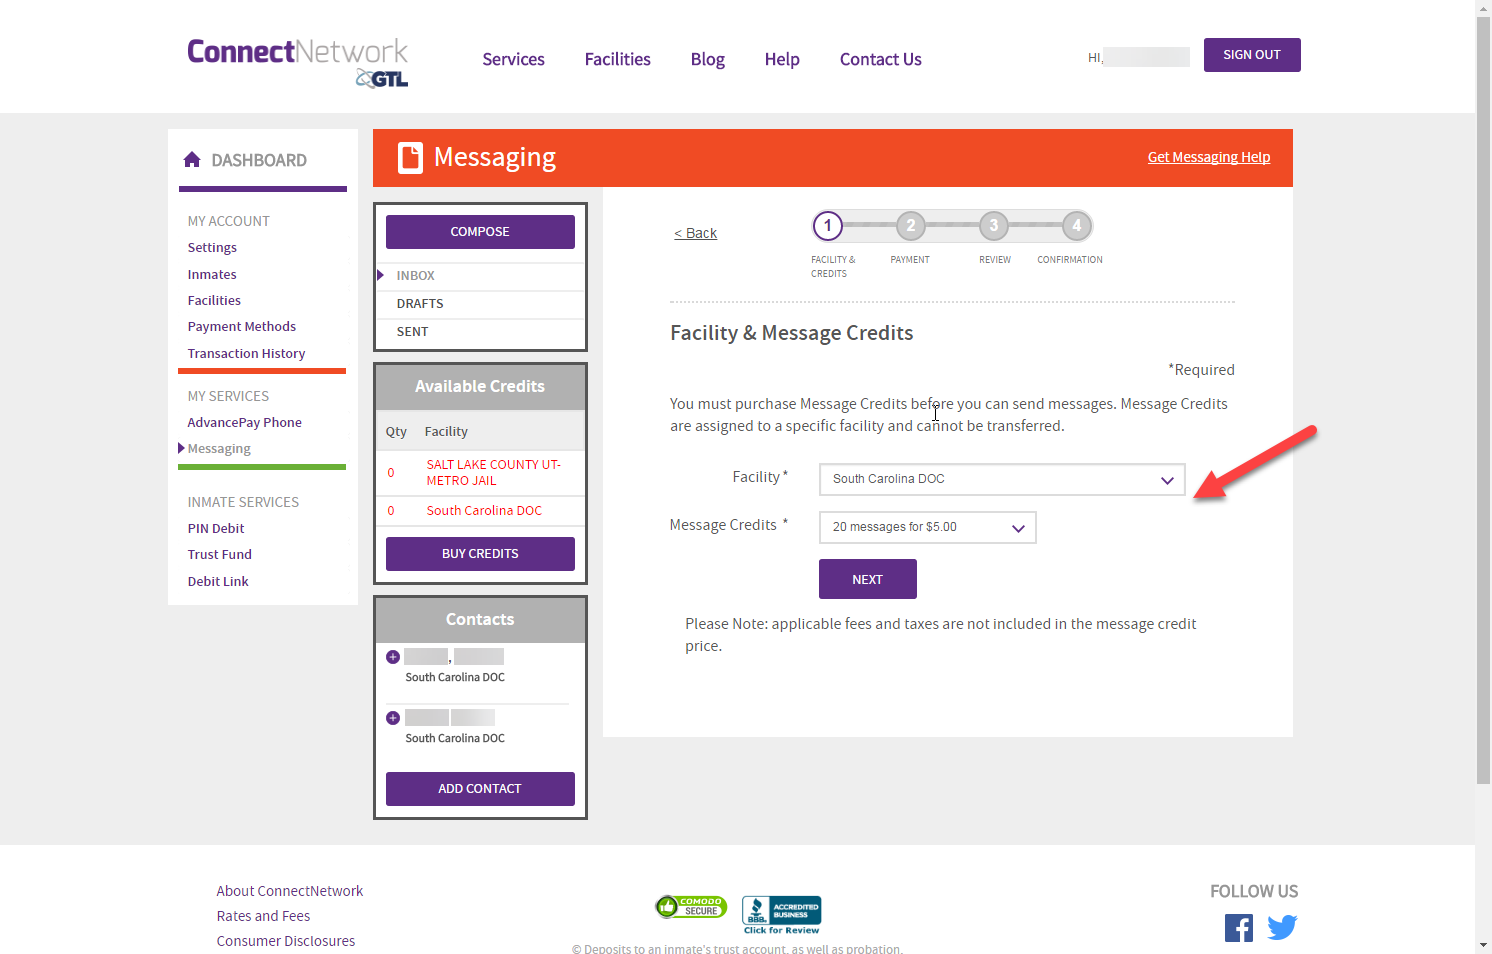 |
| 9. Now, enter the required “Payment Method.” If you have previously made a transaction through ConnectNetwork, your credit card information may already be saved to your account. In this case, you can opt to “Use a stored card.” If you currently do not have a credit card on file, you will need to select “Use a new card.” (If you select “Use a new card,” you can skip to Step 11 below.) | 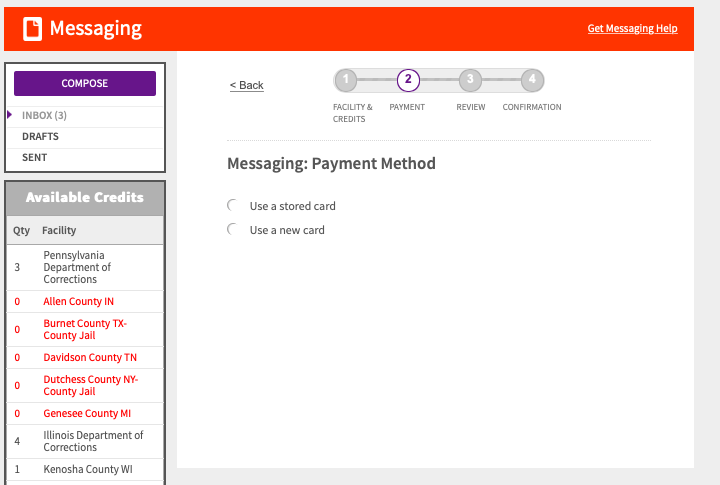 |
| 10. If you selected “Use a stored card,” you will then have to select or edit the credit card you want to use. Once you select it, you will need to re-enter the “CVV” code on the back of your card (as a security precaution). After entering the code, then select “CONFIRM.” | 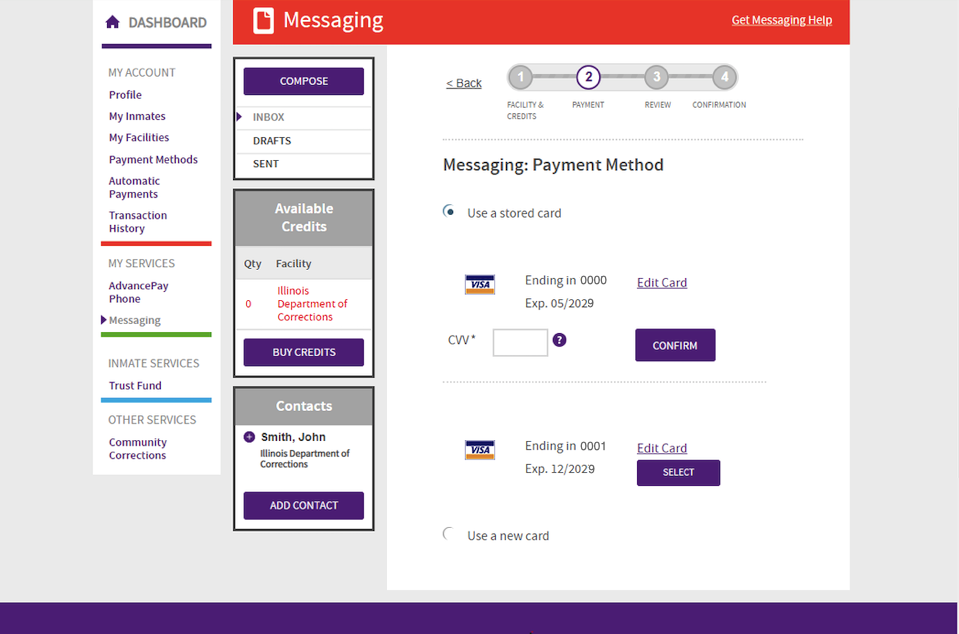 |
| 11. If you selected “Use a new card,” you will then have to enter all the requested information. (If there is anything wrong with a specific entry or there is an entry that is left blank, that box will be highlighted in red for you to correct before you can proceed.) Once you are ready to proceed, select “CONTINUE.” (If you also check the box above “CONTINUE,” you can save this card to your “Payment Methods” for future use.) |  |
| 12. Next, you will be given the opportunity to review your purchase prior to submitting your request. If you need to make any adjustments to your request, please use the back button located at the top of the page. If there are no changes to your request, please select the “SUBMIT” button to process your request. (Note: please only select the “SUBMIT” button one time.) | 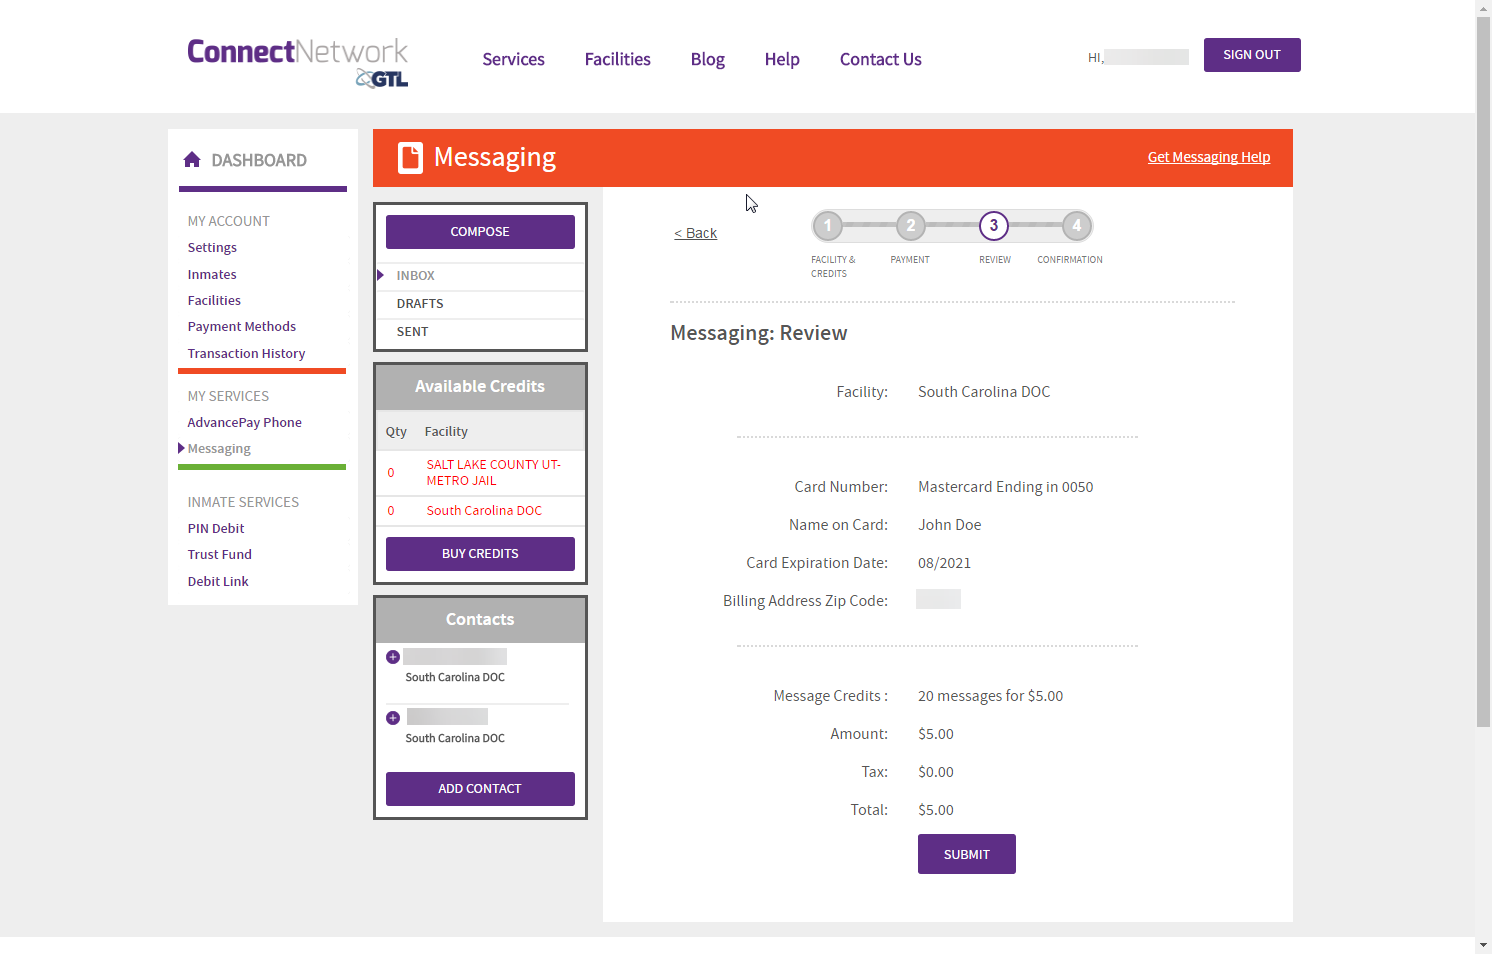 |
| 13. The final step of the payment process is to get a receipt for your transaction(s). In addition to the confirmation message you’ll receive on the screen, you’ll also be sent an electronic copy of your receipt to the email address that is on file for your account. (You can also select “Return to Inbox.”) | 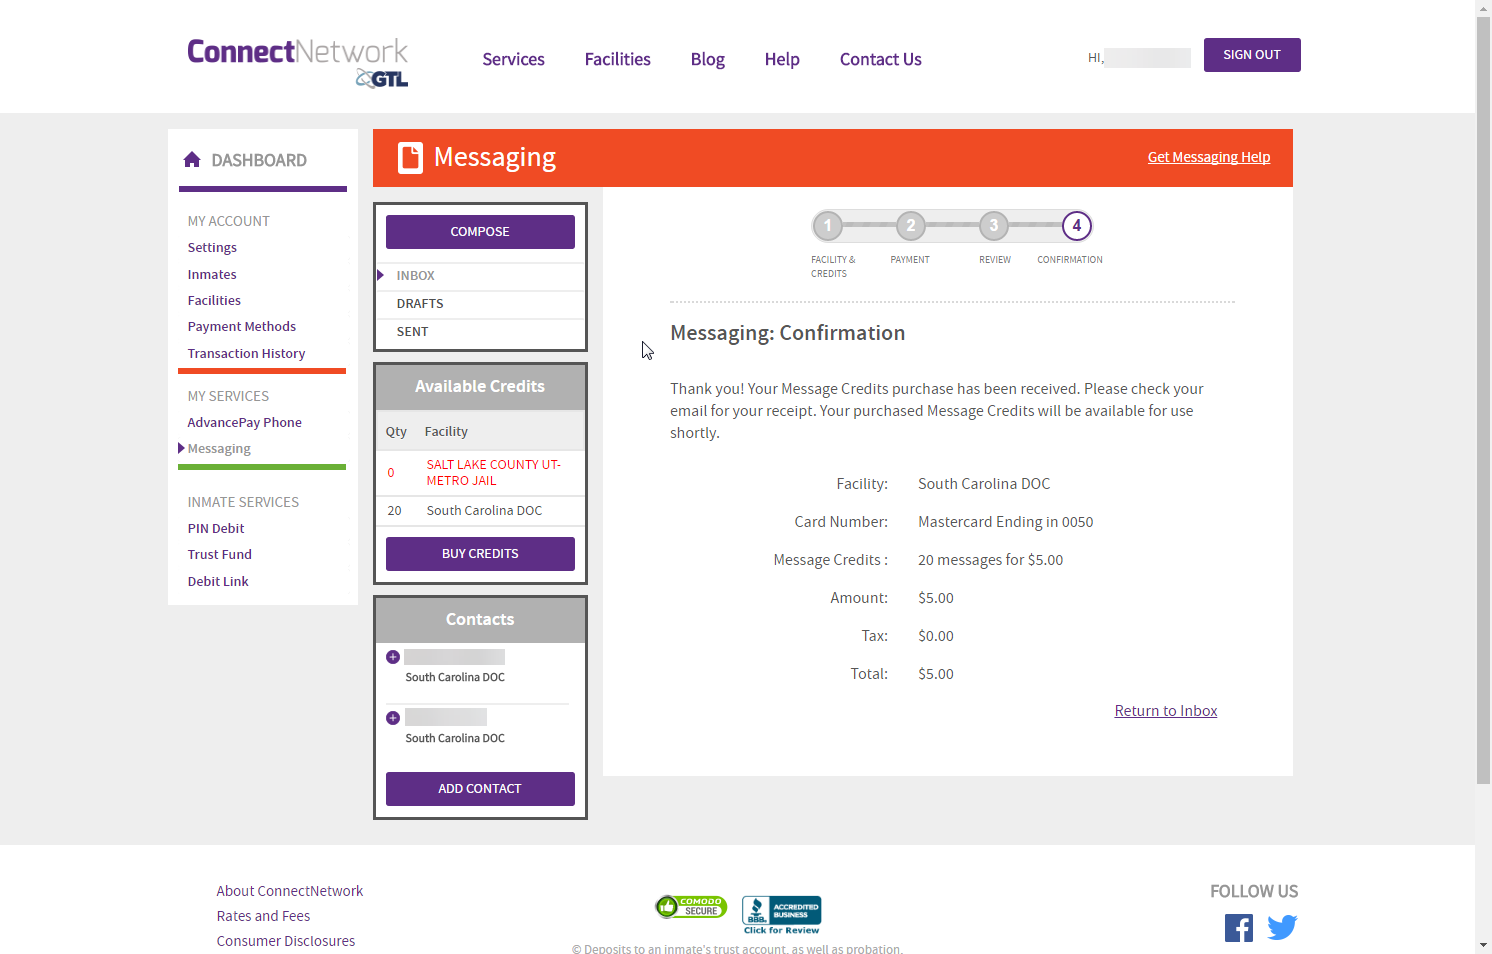 |
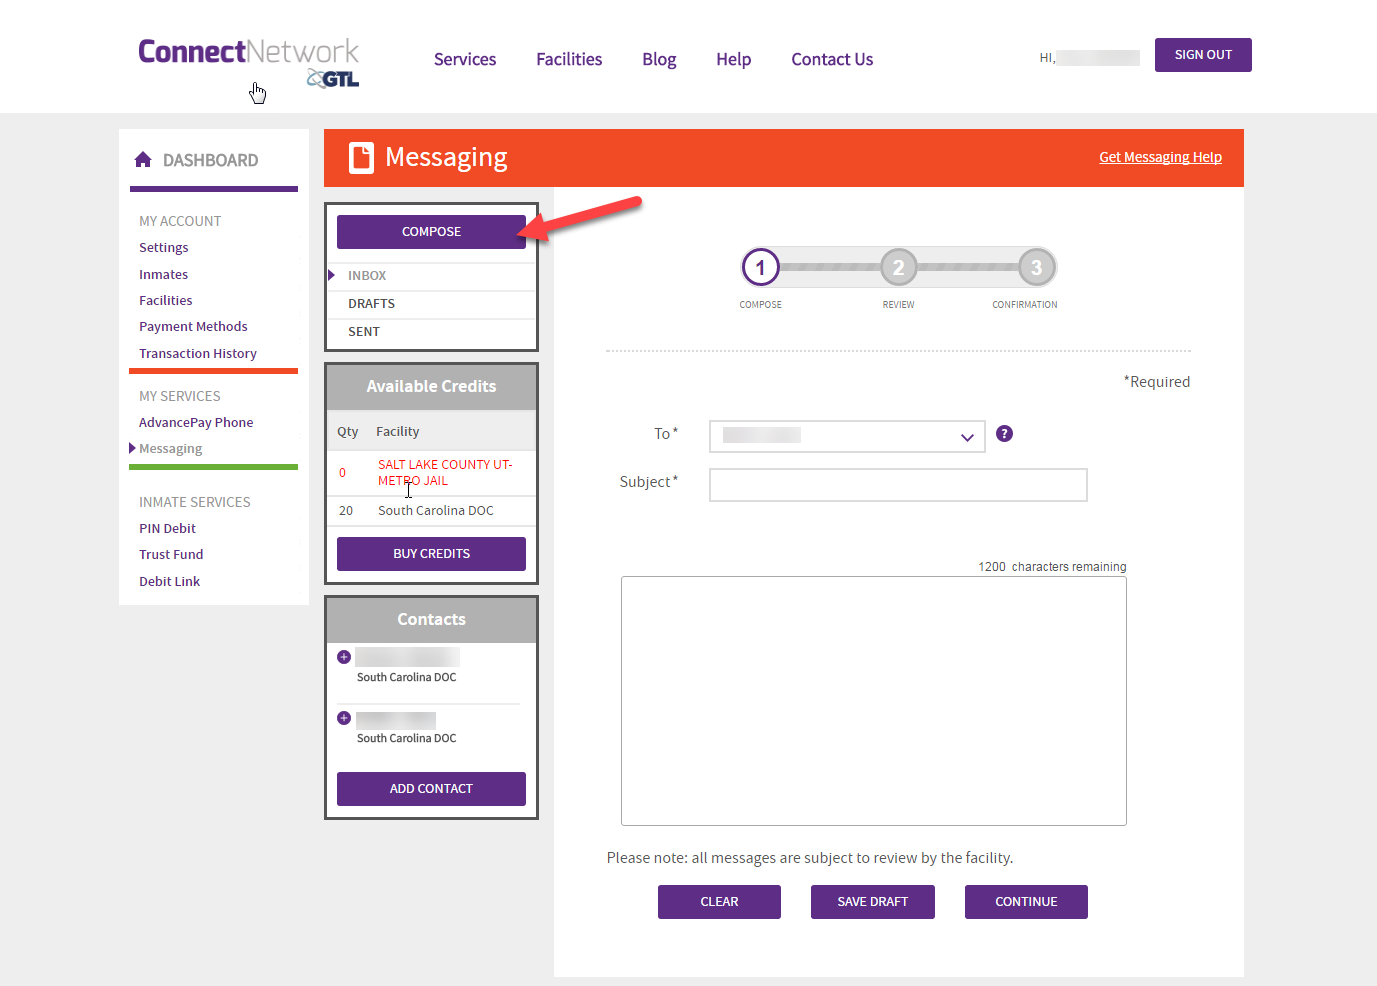
| 14. You are now ready to compose your message. Select the appropriate contact from the drop-down menu, and then type your subject line and message. You are allowed up to 2000 characters per message. (There is a counter on the right side that will keep track of how many characters you have written.)
When your message is complete, click the “CONTINUE” button to preview your message, or “Save Draft” to save your message for further editing or to send at a later time. You may also click “CLEAR” to discard your message without sending. (Canceling a message will not use any of your credits.) |
 |
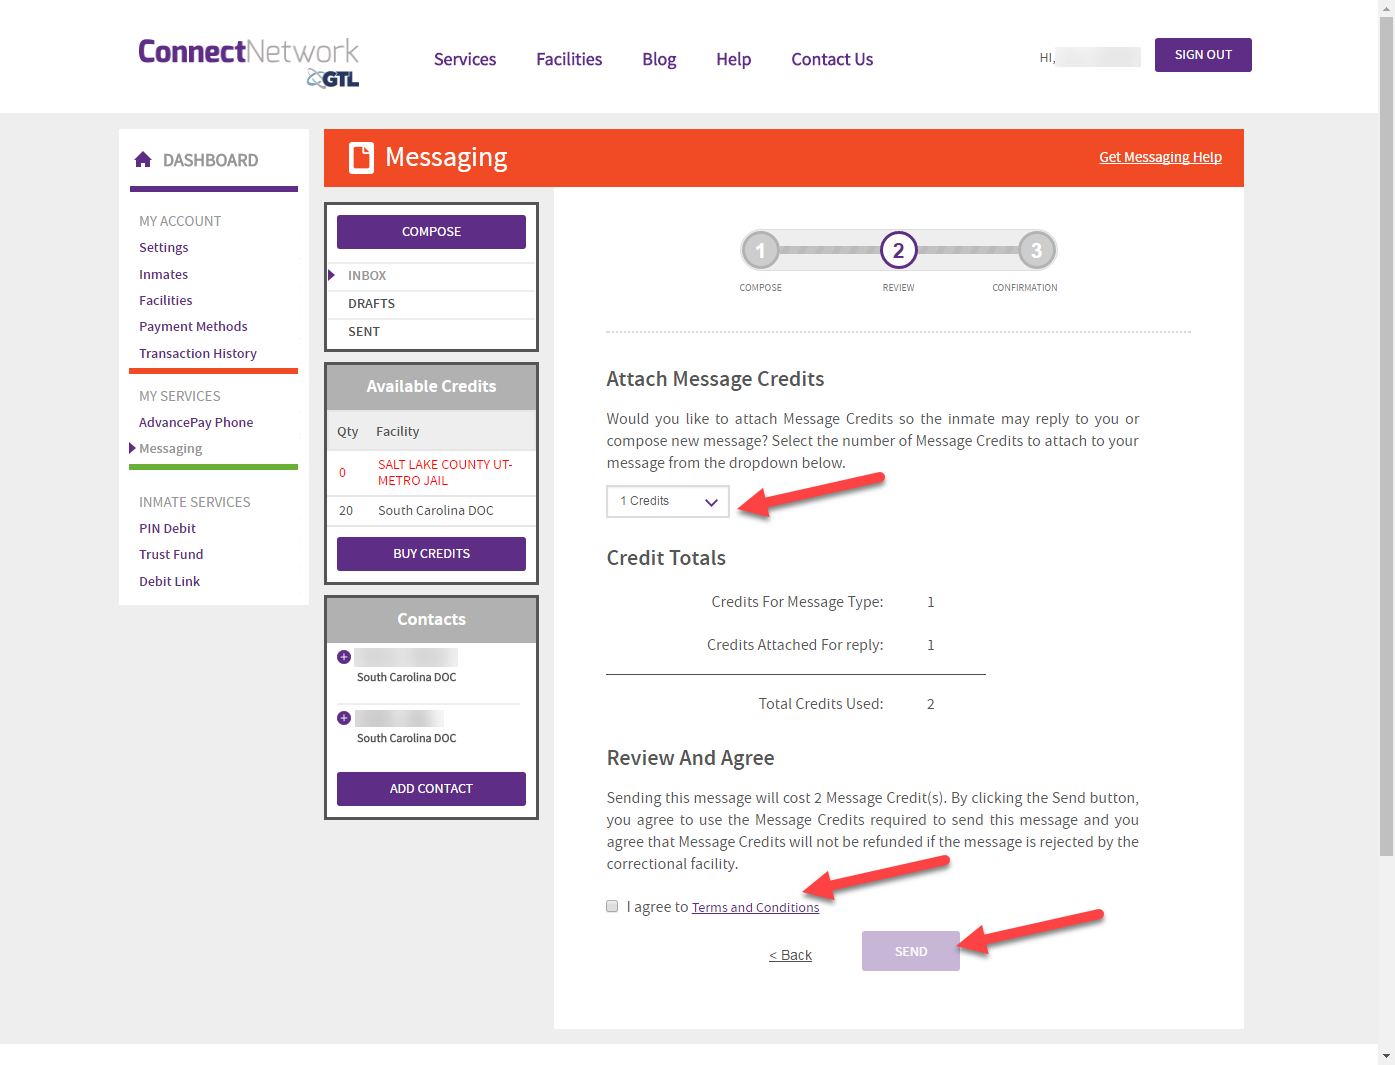
| 15. After you click the “CONTINUE” button, you will get the review page. This page will provide you with a review of the cost to send your message to the selected inmate. In addition, you will be provided the opportunity to attach credits for the inmate to reply to your message.* You must accept the Terms and Conditions and click the “SEND” button for your message to be successfully delivered to your inmate. If you do not wish to send your message, click “Back.”
*NOTE: This feature is only available at GTL facilities that allow for prepaid return messages. If this feature is not available, your inmate will need to purchase the necessary credits to reply to your message.
|
 |
| 16. To view prior messages, you can click on the “SENT” folder on the left-hand side of the screen. To see saved messages that have not been sent yet, click on the “DRAFTS” folder. To see messages you’ve received, click on the “INBOX” folder. | 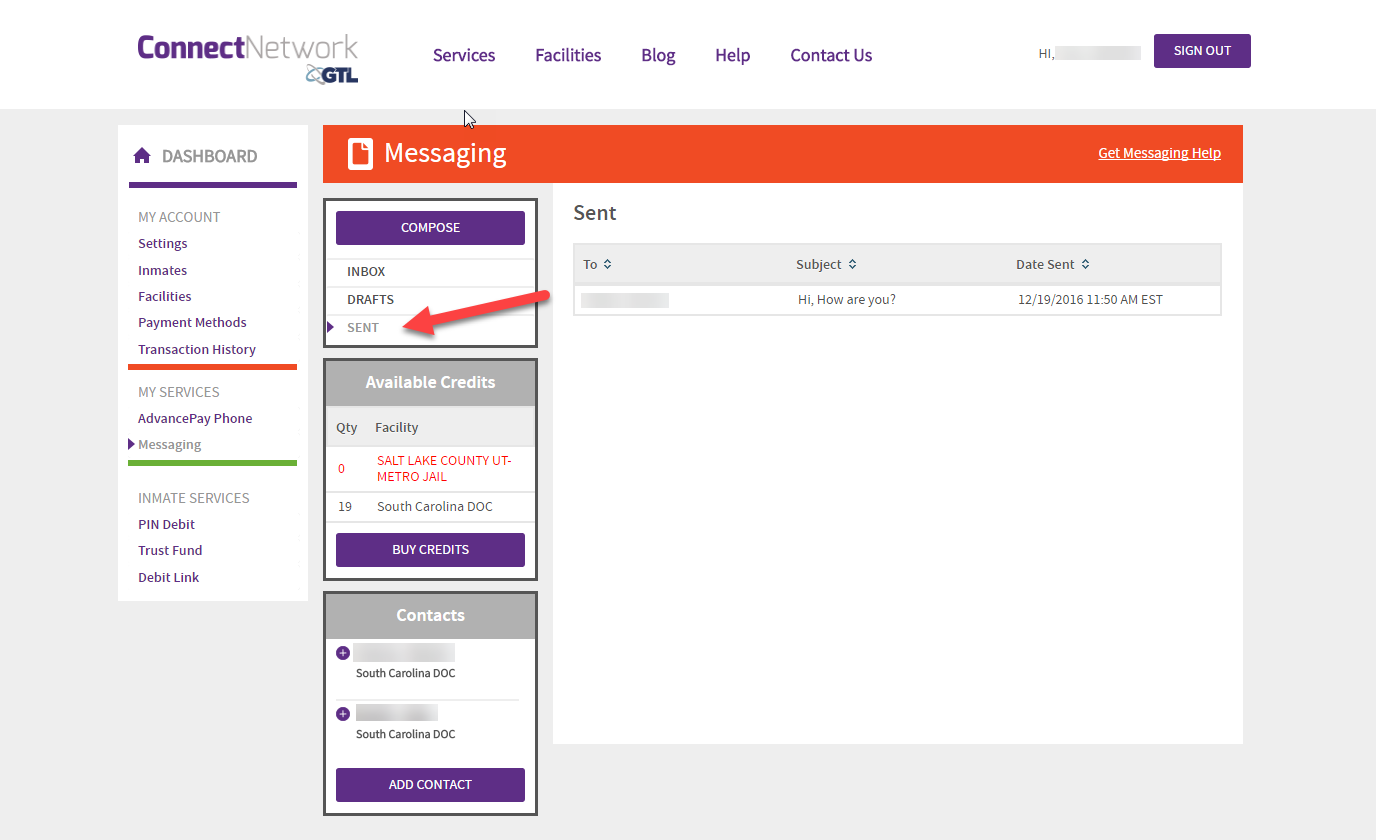 |